Search
-

The Unmatched Health Benefits of Snowshoeing
Snowshoeing is an excellent winter workout that can help burn calories, strengthen muscles and boost cardiovascular health. Explore the top 8 snowshoeing spots and experience this ultimate workout adventure! Significant Health Benefits: Exceptional cardiovascular workout – burn up to 1,000 calories per hour! Low-impact muscle building Endurance building Balance strengthening and agility Improves your sense of well-being by connecting to nature Prepping for Your Adventure There are some crucial details to think about when it comes to snowshoeing, especially if you are a beginner. Make sure to pick the right kind of footwear to go on top of your snowshoes; a pair of comfortable waterproof boots are a great choice and remember to wear lots of layers. Several local places rent snowshoes if you aren’t sure about spending money on a pair. Check out Bobos Ski and Board Patio or our local REI Co-Op. Check out REI’s Beginner’s Guide to Snowshoeing for reference. 8 Cool Snowshoeing Spots 1. Galena Creek Park Close to Reno, this beautiful, low-altitude park offers several trails. You’ll find various creeks and streams under cover of pristine ponderosa pines. From beginner to advanced, the differing trail systems provide a challenge for everyone! Head west on State Route 431 (Mt. Rose Highway) for about seven miles until you see the park sign on the right side of the highway. 2. Tahoe Meadows – Chickadee Ridge This local favorite not only gives fantastic views of Lake Tahoe but the best part? – friendly little chickadees will eat seeds right out of your hand! Be sure to pack plenty of sunflower birdseed, as that seems to be their favorite. From the trailhead parking lot, head southeast into the open meadow. Then follow the ridgeline to your right (southwest). Continue southwest up toward the top of the ridgeline to the west, and you’ll get to Chickadee Ridge in just under two miles. 3. Spooner Lake Trail The easy 2.5-mile loop around Spooner Lake is excellent for all skill levels. This alpine lake is surrounded by aspen trees which house varied bird species, so bring your binoculars! Dogs are allowed on a leash, and all-day parking is $10. 4. Kirkwood Ski Resort You’ll need a trail pass, but this South Lake Tahoe resort has various routes from beginner to advanced, with roughly 50 miles of terrain. Nighttime snowshoe treks during the full moon are also available throughout the winter. Kirkwood is located on Highway 88, close to Carson Pass. 5. Camp Richardson Heading north, you can find this well-established and favorite local snowshoeing spot. If you’re up for an adventure, you can trek up to Fallen Leaf Lake. It’s located off Highway 89 and near Fallen Leaf Road. 6. Dry Pond Loop This moderate, 6.5-mile loop near Washoe Valley has impressive views of Carson Valley, Washoe Lake, and the Mt. Rose Wilderness. If you like the sound of rushing water, most of the trail meanders along White’s Creek. This area is dog-friendly and kid-friendly, which makes it a family favorite. 7. Royal Gorge Soda Springs is home to this resort, which is well known for its cross-country skiing trails. Enjoy extensive trails leading deep into the trees with spectacular views. Find Royal Gorge from the Soda Springs exit on West Interstate 80. 8. Ash Canyon Creek Tucked away in the Carson Valley, these trails are filled with mountain bikes in the spring and provide excellent snowshoeing trails in the winter. Find it from Interstate 580 by taking the Highway 395 Business exit to Winnie Lane.
Read More About The Unmatched Health Benefits of Snowshoeing
-

The Expanded Role of OBGYNs in Women's Healthcare
Obstetrician-gynecologists (OBGYNs) see patients from menses (the monthly menstrual cycle that occurs as a part of the female reproductive system), pregnancy and childbirth through menopause and play a pivotal role in managing reproductive health and overall wellness. Dr. James Alexander with Renown Women's Health explains. "As experts in women's health, we are uniquely positioned to recognize subtle changes or symptoms that might indicate broader health issues. This comprehensive approach allows us to serve as a valuable first touchpoint for various health concerns." Preventive Screenings: A Proactive Approach One key aspect is an OBGYN's ability to recommend preventive screenings based on your symptoms, age, lifestyle and medical history. For instance, lipid screenings are critical for monitoring cholesterol levels, which can be a significant factor in women’s heart disease. An OBGYN keeps up with the current guidelines for routine screening as well as in women with risk factors such as high blood pressure, diabetes, or a family history of heart disease during your visit. By identifying risks and abnormal screening early, they can collaborate with you to implement lifestyle changes or treatments to reduce your risk of heart conditions. Schedule Your Screening Appointment Make an Appointment by Phone: 775-982-5000
Read More About The Expanded Role of OBGYNs in Women's Healthcare
-

How Regular Cervical Cancer Screenings Can Save Lives
According to the American Cancer Society, approximately 13,820 new cases of invasive cervical cancer will be diagnosed, and 4,360 women will die from cervical cancer. However, cervical cancer is preventable with regular screening tests and the HPV vaccine. It’s important to note that medical advances have allowed progress in diagnosing and treating cervical cancer. While it used to be one of the most common causes of cancer death for American women, the incidence of death has significantly declined. What to Know About the HPV Vaccine HPV vaccination is the best way to prevent cervical cancer and is recommended for all youth starting as early as age 9, or for teens and adults up to age 45 who didn’t start or finish the series. In Nevada, only 50.1% of teens ages 13-17 have been vaccinated for HPV. There are 13 types of HPV, and the vaccine Gardasil 9 protects against 9 of those HPV strains, greatly reducing the incidence of cervical cancer among vaccinated individuals. What to Know About Cervical Cancer Screenings The CDC says the most important thing you can do to help prevent cervical cancer is to have regular screening tests starting at age 21. And there are two common tests that can detect early stages of cervical cancer (or precancer) and improve health outcomes. The pap test (or pap smear). This screening looks for precancers. Women should begin getting pap smears when they’re 21. The human papillomavirus (HPV) test looks for the virus that can cause these cell changes. Cervical Cancer Screening Schedule The American Cancer Society offers the following guidelines for screenings: All women should begin cervical cancer screening at 21. Women between 21 and 29 should have a pap test every three years. Beginning at 30, the preferred way to screen is with a pap test combined with an HPV test every five years. This is called co-testing and should continue until age 65. A pap test (or pap smear) is performed during a regular screening appointment to look for precancers, cell changes on the cervix that might become cervical cancer if they are not evaluated or appropriately treated. Typically outpatient procedures can reduce the risk of long-term health impacts that prevent pre-cancerous cells from becoming cancer cells. Women over 65 who have had regular screenings in the previous ten years should stop cervical cancer screening as long as they haven’t had any severe precancers found in the last 20 years. How to Get Screened Request an appointment with your primary care physician or OBGYN to schedule a screening.
Read More About How Regular Cervical Cancer Screenings Can Save Lives
-

How to Treat a Sprain or Strain
Injuries happen to everyone. They are caused by participating in sports, recreational activities like hiking, and even by accidentally stepping off a curb wrong. If you experience a sprain or strain, the first few days are often the most painful. Renown Sports Medicine physicians Luis Palacio, MD and Brandon Hockenberry, MD walked us through what to do after an injury. Listen to Your Body See a medical professional right away if: You know or suspect that a bone is broken You are having difficulties putting full weight on a joint of the leg Pain or swelling is severe There is a sign of an infection, such as redness and warmth in the joint The First 24-72 Hours Joint sprains tend to swell more than muscle strains. You can use ice as needed for comfort and to relieve any pain, but do not use ice for more than 15-20 minutes at a time. Ice and NSAIDs (such as ibuprofen) can help prevent excessive swelling and mask the pain, but they do not speed recovery. Some research shows that overuse of ice actually delays recovery. During the first 24-72 hours, your injury will go through an inflammation phase. Inflammation is your body’s natural way to dispose of dead tissue cells, build new healthy structures, and hopefully heal even stronger than before.
-

Why are Annual Exams & Routine Screenings Important?
March is Colorectal Cancer Awareness Month, and we want you to receive the best preventative care possible. Early detection can help prevent serious illness, yet many people still choose to skip their annual exams and routine screenings. Bonnie Ferrara, MD, MPH, Section Chief for Primary Care at Renown Medical Group, further explains the importance of this simple, easy way to stay healthy. Why are annual exams so important? The benefits of early detection and prevention to save lives and reduce the impacts of disease have been proven. These exams are the perfect opportunity to get your health questions answered. “This is your chance to sit down with your provider and talk about your overall health and your family’s health history as well as your concerns for the future,” says Bonnie Ferrara, M.D., family medicine. “It’s the opportunity for your provider to talk with you about your lifestyle, tobacco use, exercise and alcohol use, all of which make a difference in your future longevity.” The annual wellness exam is also an ideal time for most adult patients to discuss health screenings. In addition, these visits are the perfect time to address issues that may not directly relate to a particular medical problem or immediate illness. A good rule of thumb is to schedule these appointments around your birthday each year to make sure you and your provider are both updated on your care. Why would you need an annual exam if you aren’t feeling sick? According to Dr. Ferrara, seeing your care provider when you aren’t sick is one of the best times. “It is better if you try to arrange this visit when you are not feeling ill,” she says. “It is an opportunity to talk about wellness. Not only how to contribute to your wellness but also the changes that you can make that will make huge dividends in the future for your wellness. In addition, it allows us to do some education about what to expect in the coming years as far as your health and lifestyle changes.” What can you expect at an annual exam? Annual exams usually check your: History – lifestyle behaviors, health concerns, vaccination status, family medical history Vitals – blood pressure, heart rate, respiration rate and temperature General appearance – your care provider can find out a lot about you just by watching and talking to you Dr. Ferrara adds, “If this is a Medicare annual wellness exam, it is an opportunity to talk to your provider about depression and dementia as well as be tested for those.” You can also leverage your annual exam to speak to your provider about managing your chronic health problems. "As a provider, these visits give us the opportunity to hear how the medications and lifestyle changes we have recommended are working and if you are having problems with these, we have the opportunity to make suggestions of how to do things better for the future," Dr. Ferrara.
Read More About Why are Annual Exams & Routine Screenings Important?
-
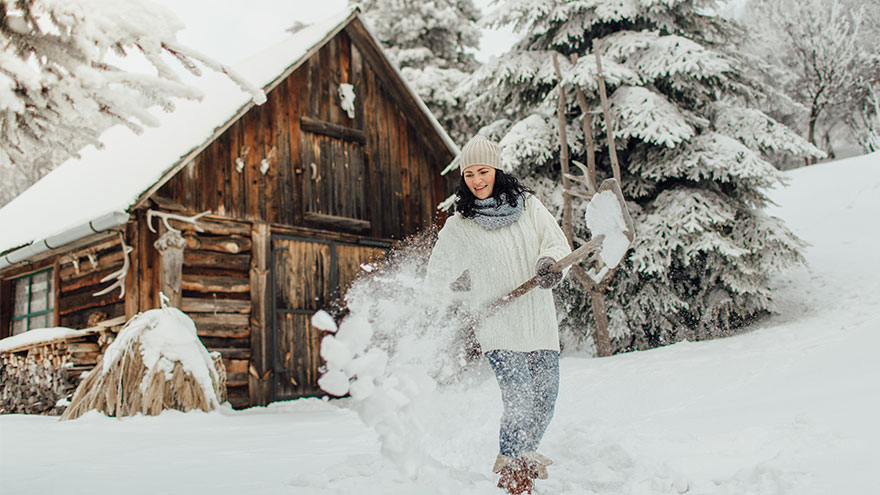
6 Tips for Safe Snow Shoveling
While the appearance of a winter wonderland in your yard can be a welcome one, an accompanying aspect is not: the idea of clearing your driveway and sidewalks. The sometimes-daunting task of snow shoveling is a repetitive activity that can cause muscle strain to the lower back and shoulders. However, by following the tips below, you will spend more time appreciating your winter wonderland -- when your sidewalk and driveway are all clear, that is. But, we all know that injuries happen, and if you do find yourself with back pain that does not resolve in a few days, contact your primary healthcare provider, or visit a Renown Urgent Care. Another way to avoid injury during strenuous activity, or help heal an injury that won't go away, is to work with a physical therapist who can offer at-home exercises to keep your body strong. 6 Tips for Safe Snow Shoveling Following these tips from the American Physical Therapy Association can help you avoid injuries: Lift smaller loads of snow, rather than heavy shovelfuls. Be sure to bend your knees and lift with your legs, rather than your back. Use a shovel with a shaft that lets you keep your back straight while lifting. A short shaft will cause you to bend more to lift the load. Using a shovel that’s too long makes the weight at the end heavier. Step in the direction where you are throwing the snow to prevent the low back from twisting to help prevent “next-day back fatigue.” Avoid excessive twisting because the spine cannot tolerate this motion. Bend your knees and keep your back as straight as possible so that you are lifting with your legs. Take frequent breaks when shoveling. Stand up straight and walk around periodically to extend the lower back. Backward bending exercises while standing will help reverse the excessive forward bending of shoveling. Stand straight and tall, place your hands toward the back of your hips and bend slightly backward for several seconds. When in doubt, ask for help. The Reno community is a generous one and you can typically find snow shovelers for hire on local message boards like Nextdoor and Facebook. Or, if you have a kid in your neighborhood, they might be looking to make some extra money on a snow day.
-

Lung Cancer Screening and Early Detection
Lung cancer is the leading cause of cancer deaths in both men and women in the U.S. The good news is the five-year survival rate increases dramatically if lung cancer is treated before spreading to other parts of the body. Julie Locken, MD, of Renown Health Imaging, explains more. What are the signs and symptoms of lung cancer? As you might expect, most lung cancer symptoms appear in the chest and can affect your breathing. Watch for signs such as: Persistent cough Constant chest pain Shortness of breath Wheezing Bloody or rust-colored phlegm Hoarseness Swelling of the neck Pain or weakness in the shoulder, arm or hand Recurring pneumonia, bronchitis or other lung infections Loss of appetite and loss of weight can also be signs of lung cancer That said, there are usually no symptoms in the early stages of lung cancer, which means getting screened can truly be a lifesaver. If you have a history of smoking, you should get screened as a precaution. What are the risk factors of lung cancer? Around 80% of lung cancer cases stem from a history of smoking tobacco. But there are other known causes, such as secondhand smoke, radon, asbestos and diesel exhaust. It’s important to do what you can to eliminate exposure to all of these to reduce your lung cancer risk. People with an immediate relative – a parent, sibling or child – diagnosed with lung cancer and people between 50 and 80 years old are also at higher risk and may need to consider screening. People who are at the highest risk are those with a history of smoking tobacco, particularly smokers who averaged one pack of cigarettes per day for 20 years or more, as well as former heavy smokers who quit in the last 15 years.
-

Ladies! Get Screened for Breast Cancer
Early detection is a significant piece of the breast cancer puzzle. Susan Cox, Renown Health Director of Cancer Operations, discusses what you need to watch for and how the latest technology can help detect potential cancer sooner. When should women start getting breast exams? It depends on risk factors: Average-risk women: Most medical organizations recommend the first mammogram between 40 and 44. Higher-risk women: Dependent on their high risk, which will dictate when they start screening, but generally around the age of 30 and not before 25 years old.
-

Prevention Against STIs Matters
According to the U.S. Department of Health and Human Services, there are more than 20 million estimated new sexually transmitted infection (STI) cases in the United States each year, with rates continuing to increase. What you may not know is most STIs are preventable. We talked with Renown Adolescent Medicine Specialist, Caroline Barangan, MD to learn more about STIs. How Can You Get an STI? The CDC (Center for Disease Control) says that STIs are acquired through sexual contact. There are bacteria, viruses or parasites that can cause an STI which may pass from person to person in blood, semen, vaginal and other bodily fluids. How Do You Know if You Have an STI? STIs can have a range of signs and symptoms such as: Warts, bumps or sores on or near the penis, vagina, mouth or anus Swelling, redness or severe itching near the penis or vagina Discharge from the penis Vaginal bleeding that’s not your period Painful or uncomfortable sex Vaginal discharge that has an unpleasant odor, causes irritation or is a different color or amount than usual Weight loss, diarrhea or night sweats Aches, pains, fever and chills Jaundice (yellowing of the skin and whites of the eyes) Painful or frequent urination Sore throat if you engage in oral sex It’s important to know that the majority of people who have an STI commonly have no symptoms at all, which is why it’s important to get regularly tested once you have had any sexual activity. Young people less than 25 years of age should be screened on a yearly basis at minimum.
-

8 Important Health Screenings for Men
Men are generally less likely to visit their doctor for exams, screenings, and consults compared to women. To address this, we've collaborated with Dr. Bonnie Ferrara of Renown Health, to compile a list of eight essential screenings that can help men maintain their health. 1. Blood Pressure Tests Ages 20+ Blood Pressure tests measure the pressure in your arteries as your heart pumps. Biennial (every two years) checks are recommended if you have normal blood pressure or more frequently if you have high blood pressure (hypertension) or low blood pressure (hypotension). The United States Preventative Services Taskforce cites normal blood pressure below 120 systolic (top number) and 80 diastolic (bottom number). 2. Cholesterol Screening Ages 20+ High levels of cholesterol increase your risk of stroke and heart disease. A simple blood test will help your healthcare provider determine your numbers and if you're at risk. If you have a family history of diabetes or heart disease, you may need yearly screenings. But, again, your doctor can provide the best course of action.
-

Emergency Hiking Kit Essentials
With the help of Aaron Bertalmio, MD of Renown Urgent Care, we're sharing nine essential must-have items for your hiking emergency kit. 9 Essential Items For Your Hiking Emergency Kit With more than 300 days of sunshine in Reno-Tahoe and plenty of trails to explore, you'll want to keep these essential items in your kit. 1. Water Surprisingly, this no-brainer, however, is often overlooked. Bring enough water to last for the entire adventure. This amount of water can be heavy depending on the distance, altitude or intensity. With this in mind, the next best bet is to filter or purify water from a lake or stream. Here's how: You can do this with iodine or chlorine dioxide tablets, charcoal or an ultraviolet light wand. Tip: Look for water that is moving or rushing over rocks. Having enough water or filtration cannot be underestimated. "If you become injured and need to wait for help, you can only last about three days without water," Dr. Bertalmio says. 2. Food Meals-Ready-to-Eat (MREs) or dehydrated food pouches are essential, ensuring you have plenty to eat if you're outdoors longer than expected. 3. Maps Bring a printed map, compass or GPS. You can't always rely on your smartphone, so this is the perfect backup plan. 4. First-Aid Supplies Your hiking first-aid kit should change based on the type of hiking. As a basic rule, keep the following items in your pack: Fever/pain reliever Sewing kit with safety pins Tweezers Bandages and moleskin Antibiotic ointment Duct or medical tape Whistle 5. Light Source Wear or pack a small headlamp to illuminate the way if you get caught outside after sunset or in a poorly lit area. Headlamps are also great in emergencies because they are hands-free. 6. Emergency Shelter Even if you're only going out for the day, pack a low-weight emergency blanket for the trip. In other words, if the day trip turns into an overnight adventure, the blanket will keep you warm and alive in the event of cold temperatures. 7. Fire Starter Pack small tools in your hiking emergency kit to ensure an easy fire start. Waterproof matches, a knife, a lighter, or a strike fire starter are great options. Tip: Bring a multi-tool, including a knife and scissors that can be used for first-aid. 8. Layers of Clothing Mother Nature likes to change her mind in northern Nevada, and temperatures vary significantly within 24 hours. Therefore, pack a compact, lightweight waterproof and windproof jacket. This will protect you from being uncomfortably chilly and experiencing hypothermia. "Hypothermia is when your body temperature drops to a dangerously low level. You want to avoid this completely by keeping body temperature regulated outdoors and avoiding cold water immersion," says Dr. Bertalmio. 9. Sun Protection Certainly, sun protection should be part of your daily routine and an essential in your hiking emergency kit. You'll want to bring enough sunblock to reapply in direct sunlight and layers to cover exposed skin every two hours. Dr. Bertalmio reminds everyone the sun is intense in northern Nevada. "The higher altitude means an increased risk of sun-induced skin damage," he explains. "Some trails can reach above 10,000 feet, and at that altitude, UV radiation could be 35 to 45 percent more intense than at sea level."
-
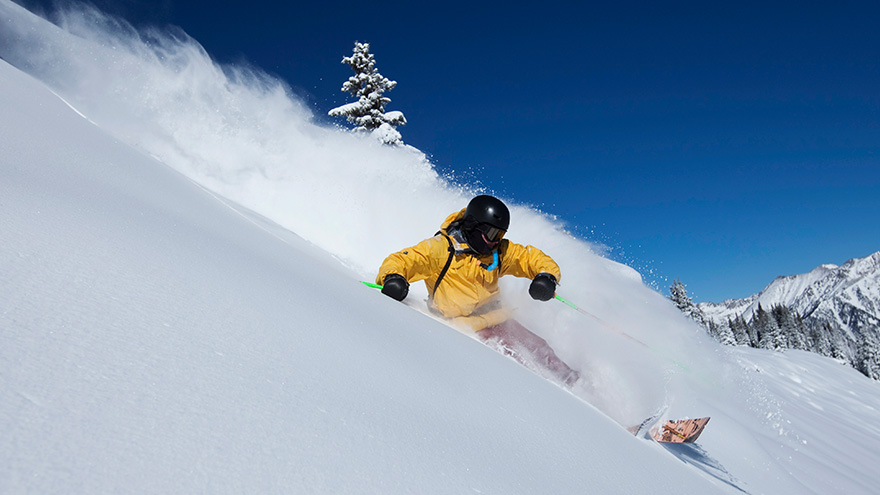
5 Training Tips for an Epic Winter Season
Whether it’s cross-country or downhill skiing, snowboarding or snowshoeing, your off-season preparation is vital to an injury-free and healthy experience once the snow starts to fall. We’ve got you covered with expert tips that will make you the king or queen of the hill. Millions of skiers and snowboarders hit the slopes annually. So whether you’re a weekend warrior or stay active year-round, you need to prepare your body for the demands of your favorite winter sport to avoid minor aches, pains or even severe injury. Count on two to three weeks for your body to adapt to the physical challenges ahead if you’re active. Otherwise, give yourself a minimum of six weeks to gear up for the snow. Ready to shred? Here are some conditioning tips to help put you on the path to a fun, successful winter season. 1. Start With Cardio Cardiovascular exercise increases endurance as it conditions the heart, lungs and muscles and provides a solid foundation for other forms of exercise. And when you live and play at altitude, you need even more endurance. “Research shows that our maximum heart rate, cardiac output and ability to exercise are suppressed at altitudes over 5,000 feet,” explains Daniel Staffa, PT, DPT, OCS, of Renown Rehabilitation Hospital. “In the Reno-Tahoe area, altitudes can quickly rise over 8,000 feet when we exercise in the Sierras, so it’s critical to have cardiovascular fitness to avoid associated fatigue and decreased mental alertness on the slopes.” Try this: Pick an aerobic activity you enjoy — speed walking, running, hiking, biking or a cardio machine like the elliptical trainer. Build up to a minimum of 30 minutes, three days a week. 2. Increase Your Strength Your core works overtime to stabilize the body and absorb the shock of pivots and turns and variable snow conditions. Strengthen your core, lower back, hamstrings and calves and you’ll go a long way toward guarding against ligament tears and damage to other joint structures. Stronger muscles will also allow you to relax while maintaining control and making those quick adjustments that uneven terrain demands. Try this: Squats, wall sits and lunges. Work your core and lower and upper extremities with a variation of sit-ups, crunches, back extensions and planks. 3. Integrate Plyometrics Staffa explains that if your legs aren’t used to absorbing the impact of landing, severe injuries can occur. Preempt such trauma with plyometric exercises, or “explosive movements,” that simulate the movements of your favorite sport. You’ll develop greater power in your legs when you combine plyometrics with your strength training. Try this: Incorporate multi-directional drills — such as lateral jumps and forward and backward jumps — on variable surfaces like a trampoline, solid ground, or a box or step. Here’s a challenge for the more advanced: Stand in front of a bench or box (12 inches or so). Jump up and then immediately back down. Do this 10 to 30 seconds at a time, rest and repeat. Or get old school and bust out the jump rope. 4. Improve Your flexibility Flexibility is the ability to move joints through their entire range of motion, from a flexed to an extended position. Being flexible will allow you to pivot, twist and turn and navigate varying snow conditions with ease. You can increase your flexibility while maintaining bone alignment with stretching. Don’t forget to warm up and cool down. Try taking it easy the first 15 minutes of your day on the hill; try starting with a beginner’s run or walk to warm up and prepare your body. Do the same at the end of the day or go for a brisk walk to cool down. Stretching will help return muscles to their normal length. Try this: Dynamic stretches such as leg swings, arm swings and torso twists. Target your quads, hamstrings, calves, and lower back. 5. Fuel for the Hill Staffa suggests loading up on healthy complex carbohydrates the day before you go out and bring along your favorite protein snacks. Assess the slopes before making that first run — is the snow heavy, fresh or wet — and stay mindful of your fatigue level throughout the day. Don’t forget to hydrate and re-hydrate before, during and after exercise. And most important, have fun! Visit Renown Physical Therapy and Rehab for more information. Or call 775-982-5001 to consult with our sports and orthopedic experts who can help you develop an individualized training program in preparation for the winter season, including methods for overcoming previous injuries and limitations.